Not that guy

Just more ramblings of another IT Guy

detectify – Free Website Vulnerability Scanning

Detectify is a cloud based security scanner (SaaS) offering a free tire for non-commercial use on a single domain.

detectify_logo

The sign up process is painless with the most difficult tasking being having to verify ownership of the domain you are signing up for. Even this is straight forward with clear, concise instructions and the option to import through Google Analytics

Adding a Domain via detectify Dashboard

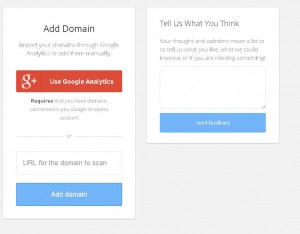
The prominence of the “Tell us what you think” widget throughout the site shows the developers really are keen to get feedback from customers and to continually improve the product.

A scan is an automatic penetration tests focusing on the exposed web application.  The free version includes many of the same features as the premium version such as scheduled scanning, reports etc

Hosted on Amazon’s aws cloud the scan covers OWASP’s top 10 and the findings classified according to CVSSv2.

The scan itself is broken down into the following stages

  1. Information Gathering
  2. Crawling
  3. Information Analysis
  4. Fingerprinting
  5. Exploitation
  6. Synchronous Exploitation
  7. Finalization

More information on the above can be found here

The generated report is quite useful in detecting unknown vulnerabilities and patching them before they are exploited.

This is definitely worth a review and test because, as detectify say….

..”GO HACK YOURSELF OR SOMEONE ELSE WILL”

Outbound traffic on UDP port 3544

While reviewing  firewall logs I observed unexpected outbound communication attempts on UDP 3544 from a newly deployed Windows 7 installation.


“…..dstip=157.56.144.215proto=17length=89tos=0x00prec=0x00ttl=127srcport=64379dstport=3544“…..”


After quick a quick Google search it became apparent that this was related to “Teredo
http://en.wikipedia.org/wiki/Teredo_tunneling

A Teredo client is an IPv6/IPv4 node that supports a Teredo tunneling interface through which packets are tunneled to other Teredo clients or nodes on the IPv6 Internet (via a Teredo relay). A Teredo client communicates with a Teredo server to obtain an address prefix from which a Teredo-based IPv6 address is configured or used to facilitate communication with other Teredo clients or hosts on the IPv6 Internet.
https://msdn.microsoft.com/en-us/library/windows/desktop/bb968770(v=vs.85).aspx

The Teredo relay listens on UDP port 3544 for Teredo traffic.


To disable open a command prompt and issue the following command

1. netsh interface
2. teredo
3. set state disabled

This will stop the outbound UDP 3544 traffic


Need a cheap ( or free) SSL certificate for a non-production site?

Building a demo website or deploying a new application and need to secure communication via SSL?start-ssl logo-logo1

For example, when installing OwnCloud you may want to ensure that your personal files are being sent and received securely no mater where you are connecting from.   OwnCloud has the facility to require all communications to be carried out over SSL which StartSSL is perfect for.

StartSSL provide a one year certificate for free. While the website is nothing to look at ( and may even cause you to wonder if the site is legit and still active) the most important part for a test or demo site is whether or not the certificate is actually trusted by all browsers by default. The good news is that StartSSL passes this test with no issues.

startssl

When I recently tested the I found the sign-up process to be quick and painless. Ignoring the fact that the service is free, the basic domain verification was carried out very quickly especially when compared to other vendors.

It should be noted that there is a $24.90 charge to have the certificate revoked (which should not happen if the necessary precautions have been taken)

Have a look over here to see how to generate the CSR and install into apache.

Check the certificate configuration of SSL webserver

Qualys have provided a very useful tool for checking that the SSL side of your website is correctly configured.qualys

The SSL Server Test can be found here. The tool is available free of charge and will carry out a real-time ( completes in less than a minute ) analysis of the configuration on your ( or any )  webserver.

It is a simple way to make sure that after configuring your website for SSL that the server is responding with the correct certificates, that the best protocols are being used  and if the server is vulnerable to attack (such as the BEAST attack or a DoS attack)

Add enable secret to Cisco switch

enable secret 0 <followed by password>
In order to access the device manager, an enable secret is then required

Commands to edit iptables


To view the current rules and also view the rule ID use the following:

iptables -L -n –line-numbers
                     or
iptables -nL -v –line-numbers


To delete a rule use:

iptables -D INPUT X  (where x is the ID of the rule in question)


To insert a rule before another use the following:

iptables -I INPUT X -s 192.168.2.0/24 -j DROP (where X is the rule above which the rule is to be inserted)


To replace a rule:
iptables -R INPUT X -s 192.168.3.0/24 -j DROP


Make sure to save as changes will be dropped on reboot

iptables-save > /etc/iptables.rules
or
/sbin/service iptables save

Force complete website to HTTPS

`

The below can be added to the httpd.conf file for best performance as the whole site is being redirected to https (can also be added to a .htaccess file). The result is that when a client connects to the server via http they are redirect to a https connection.

<IfModule mod_rewrite.c>
RewriteEngine On
RewriteCond %{HTTPS} !=on
RewriteRule ^ https://%{HTTP_HOST}%{REQUEST_URI} [L,R=301]
</IfModule>

Copy file permissions from one file to another!!!

As the subject says the following can be used to copy the permission settings from one file to another


chmod –reference <reference-file> <target-file>


Example: chmod –reference <tobecopied.txt> <destination.txt>

Change auth-ports on Fortigate

When using a a transparent vdom and an identity based policy to authenticate users on non standard ports (i.e. when users are using the explicit proxy on port 8080) it is neccessary to change the ports the Fortigate expects http https and ftp traffic.

These commands are for each vdom.

config user setting
config auth-ports
edit 1
set port 8080set type http
next
edit 2
set port 8080
set type https
next
edit 3
set type ftp
set port 8080
next
end
end


Verify ldap bind username used for FSSO

A common source of failure for an ldap lookup when using a regular bind is incorrect user cn

On the DC verify by running following command

dsquery user -name “username”