#config global
#get sys perf top – This will display all the running processes in the Fortigate
#diag sys kill 11 <process-id> – Using the process ID from the above command you can restart a process using this command.
#config global
#get sys perf top – This will display all the running processes in the Fortigate
#diag sys kill 11 <process-id> – Using the process ID from the above command you can restart a process using this command.
If you ever needed to share your screen while on the phone to somebody but don’t want the hassle of setting up a GoToMeeting, Teamviewer or Webex then check out Screenleap.
Screenleap allows you to share your screen without any sign-in or sign up. Just visit the site and select “Share your screen now”. (Java required) All that is left then is to get the code to the person (or persons) that you would like to be able to view your screen
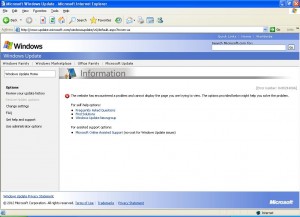
After a fresh install of windows xp (from original recovery cd) the follwoing was encountered upon trying to run wndows updates
” The website has encountered a problem and cannot display the page you are trying to view. The options provided below might help you solve the problem. Error number: 0x8024400A
“
The solution is to manually download the Service Pack 3 from Windows Update.
Credit to “mikibuchan” over at TechGuy.org
Guest profile access may be granted to users failing NTLM authentication, such as
visitors who have no user credentials on the network. To allow guest users in NTLM, use
the following CLI command: If there are multiple domains, a trust relation must exist between them. This is automatic if they are in a forest. With the trust relation, only one FSSO DC agent needs to be installed. Without the trust relation, FSSO DC agents must be installed on each domain controller.Authentication in security policies Configuring authenticated accessUser Authentication for FortiOS 4.0 MR3
config firewall policy
edit 8
set action accept
set identity-based enable
set ntlm enable
set ntlm-guest enable
next
end
Use the following commands to enable encryption between the FortiGate unit and the FortiAnalyzer unit:
On the FortiGate unit:
config log fortianalyzer setting
set encrypt enable
set psksecret <presharedkey_str>
set localid <devname_str>
end
On the FortiAnalyzer unit:
config log device
edit <devname_str>
set secure psk
set psk <presharedkey_str>
set id <devid_str>
end
While I have not had the opportunity to test this yet Terry Burton of http://blog.terryburton.co.uk has a very simple solution to the issue of getting the Apache access_logs to be set via syslog. By default Apache only seems to support sending the Error_Log using Syslog.
The following line can be added to the Apache conf file
CustomLog “|/usr/bin/logger -t apache -i -p local6.notice” combined
(The syslog conf file will also be required to be updated accordingly)
Please find Terry’s post site here
Wan Opt and Web Cache has gone CLI only for certain Fortigate models (See below) since Version 4 Mr3 Patch 4.
The removal from the Web GUI is apparently for performance reasons.
By default on Fortigate units with hard drives logs are only uploaded once a day. Units without a hard drive upload in realtime by default.
If you would like a hard drive equipped Fortigate to upload logs in Realtime use the following commands:
# config log FortiAnalyzer setting
#set upload-option realtime
#end
Full Fortinet KB article is here
Fortinet has published a list of the supported 3G modems for Version 4 MR3 Patch 6 and it can be found here
In the circumstance where you are trying to use the “send on behalf” feature of a newly created user you may encounter the following error:
“You do not have permission to send to this recipient. For assistance, contact your system administrator.”
The reason for this is that the Offline Address Book may not have updated yet. I believe that this happens once a day by default.
To update the Offline Address Book do the following
1. On the Tools menu, point to Send/Receive, and then click Download
Address Book.
2. In the Offline Address Book dialog box, make sure that the Download
changes since last Send/Receive check box is checked.
3. Click OK.